Potter DIY: “Harry Potter” Coasters
Looking for the perfect Harry Potter-themed gift? Why not make one? This DIY will teach you how to make fancy Hogwarts House-themed coasters.
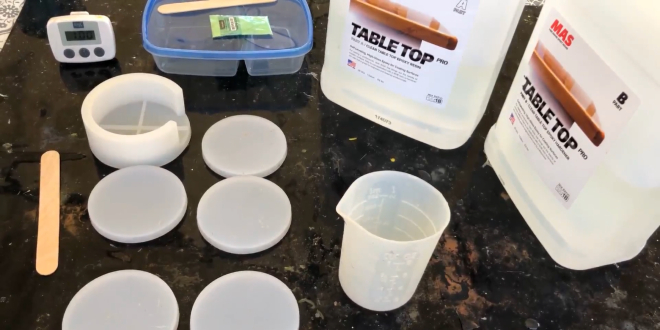
What You’ll Need:
- MAS Epoxy Table Top Pro
- Respirator
- Disposable gloves
- Working mat (silicone recommended)
- Silicone coaster molds (round)
- Mixing cups with measurement lines (silicone recommended)
- Mixing sticks
- Powder pigments (red, gold, yellow, black, blue, bronze, green, silver)
- Paint (if needed)
- A clock or timer
- Hand torch or Isopropyl Alcohol in a spray bottle
- Heat gun
- Duct tape
- Xacto blade
- Dremel with sanding bit
- Safety glasses
- Round cork adhesive backings
Directions:
Here are some important things to know about the material before getting started. Epoxy resin fumes are toxic, so you will need to keep your respirator on at all times and be in a well-ventilated space. We recommend working outside. Avoid wearing loose clothing, and long hair should be tied up in a secure bun. If the epoxy gets on your skin or in your hair, immediately wash it off with hot water and soap. Rubbing alcohol can also help clean it off. Cleaning epoxy off of clothing is very difficult, so we recommend wearing old clothes or an apron. If the epoxy is dry on your silicone molds or mixing cups and you are having a difficult time peeling all the drips off, use duct tape. This makes the cleanup much easier and faster.
You will also need to read the mixing and drying instructions for your epoxy. Every type and brand of epoxy is slightly different in its resin to hardener ratio, mixing time, working time, and drying time. Read all instructions and tips thoroughly before starting. We used MAS Epoxy Table Top Pro, so all mixing instructions will be about this particular brand.
Before starting the project, you will need to make sure all your supplies are set up and ready. Once the epoxy is mixed, you will have a limited time to finish your pour. Ensure your workspace is in a temperature range of about 70-80 degrees Fahrenheit (21-26 degrees Celcius). Find a level table with enough space to hold all supplies within easy reach. Make sure this table will not be used by others. The epoxy we used takes two to three hours to dry and 24 hours to cure (fully harden). We also poured multiple layers a day, so we needed to reserve our space.
Place down your working mat first. If you don’t have a silicone working mat, you can use a large plastic trash bag (secure the edges of the bag to the table with painter’s tape so that it won’t slip or move). Set out the rest of your supplies on the working mat; all supplies must be on the working mat, or you may risk getting epoxy on your table.
We highly recommend doing a practice round with each of your colors before you start your final piece. Many of the powder pigments we had were not quite the right color, so we mixed some acrylic paint in with the epoxy to get the perfect color. You will only be working with one color at a time, so keep all other pigments and paints off your workspace until you are ready for them.
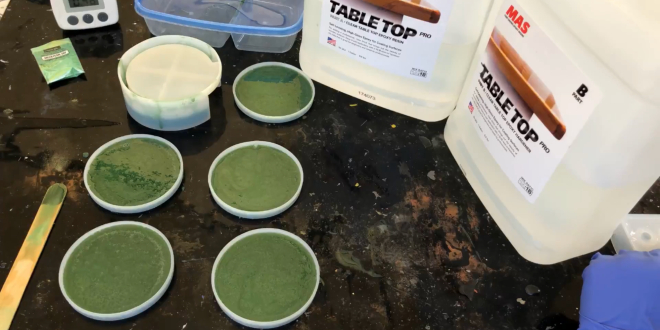
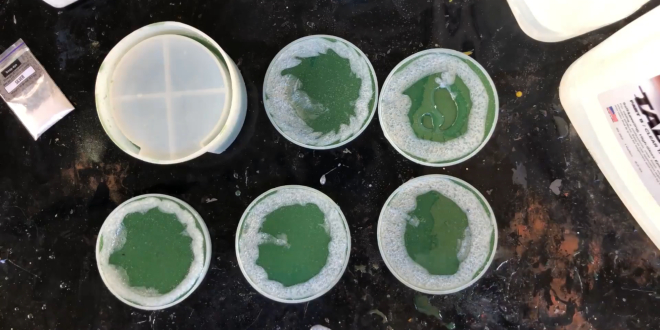
Step 1: Once your workspace is set up with all needed supplies on hand, you are ready to start. Put on your respirator and disposable gloves. Set a timer for 30 minutes; this is how much time you have to pour. In a mixing cup, pour in two and a half cups of your part A resin, and another two and a half cups of your part B hardener. Remember, it is always better to have a little too much resin than not enough. Mix slowly and carefully with your mixing stick for about four minutes. Be sure to scrape the bottom and sides of the cup. Mixing will trap some air bubbles, so let it sit for a few minutes to allow most of them to rise and pop. Add in the pigment and paint to your epoxy and mix thoroughly so that there are no streaks or clumps of color. You want to start with the main color of your Hogwarts House (so if you are a Slytherin, this would be green).

Step 2: Pour the resin into each of your coaster molds until they are a little less than half full. Do the same for your coaster holder mold. Pour your resin slowly and close to your molds to avoid trapping air bubbles.
The most effective way to pop air bubbles is with a hand torch, but be very careful not to let the flame get too close to your silicone molds. This will heat up and partially melt your molds, which will ruin them. You won’t know your mold is ruined until you try to take the resin out and the mold is sticking to the piece. If you have melted your mold, you can remove the stuck pieces with a Xacto knife. A mold-safe way of popping bubbles is to spray them with rubbing alcohol, but this will only pop surface bubbles.
Step 3: Let your first layer dry; this will take about two or three hours. Without pulling at the edges of the mold, try to remove as much excess resin from your coaster holder mold as possible. There are often dried drips clinging to the inside of the mold. The middle layer will be a different color, so you’ll want to clean that area. Be sure to clean the silicon mixing cups before using them again, and use new mixing sticks.
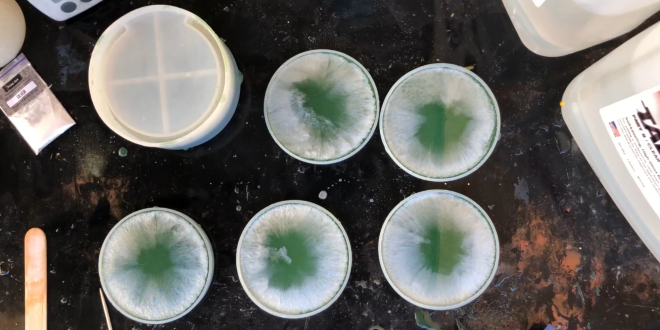
Now it’s time to pour on the second layer. Mix about four cups of epoxy resin (two cups resin and two cups hardener). Mix well and pour about half in another cup. In one of the cups, add in the pigment and paint to make your secondary color (for Slytherin, this would be silver). On the coasters, pour a ring of clear resin along the edges, then pour your colored resin on top of that clear resin – this will help the color flow better. Pour some more of the clear resin in the center of the coasters so the whole piece is covered in a new layer of resin; this will allow for the silver ring to spread toward the center. For your coaster holder, pour in a thin stripe of colored pigment until the mold is now a little more than halfway full. Pop bubbles as needed.
Step 4: Once the second layer has dried, mix another four cups of resin. Set about one or one and a half cups aside in a second cup. Leave this resin clear – it will be a topcoat for your coasters. Color the remaining pigment the primary Hogwarts House color (for Slytherin, this will be green again). Pour this into your coaster holder to fill the mold the rest of the way. Pour a layer of clear resin onto your coasters to give them a nice, even topcoat. Pop bubbles as needed.
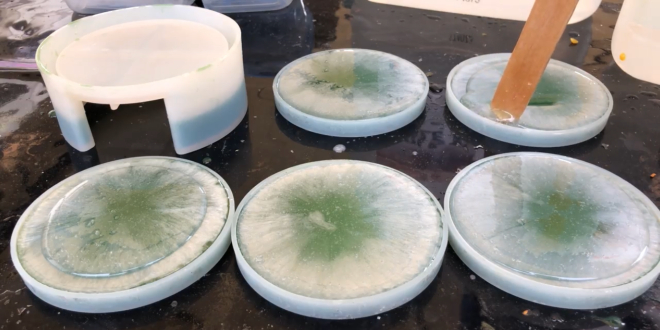
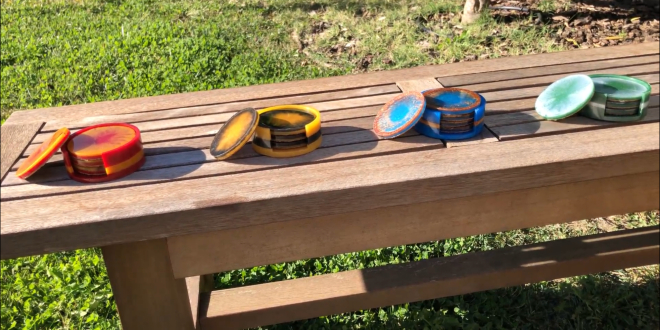
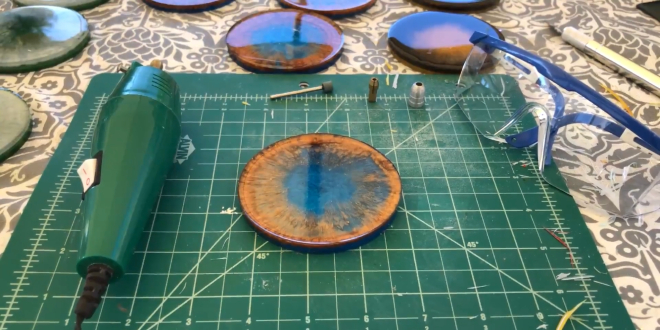
Step 5: Once the resin pieces have dried, you can take them out of their molds. There may be a few dried overhanging bits of resin or sunken sharp edges depending on whether you overfilled or underfilled your mold. These can easily be fixed. Trim all excess pieces off by heating the edges of your coaster with a heat gun and using an Xacto blade to slice them off. Using a Dremel and a sanding bit, you can round off any sharp edges. Be sure to use your respirator and safety glasses when using the Dremel!
If you do have some air pockets, bits of sanded resin may get caught in them. They can easily be cleaned with a thin paintbrush. Once your coasters are trimmed and smooth, apply your adhesive cork backing. Our backings were too large, so we trimmed the excess with an Xacto knife and sealed the cut edges with clear Elmer’s glue.
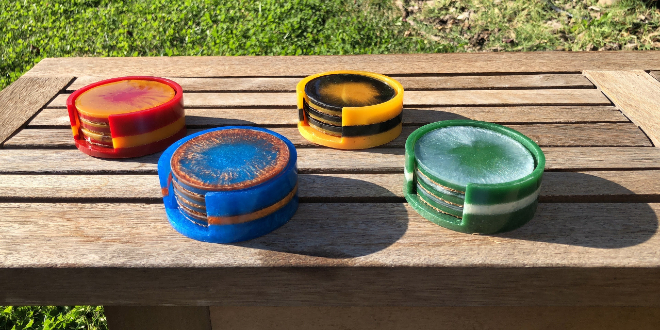
Step 6: All finished! Congratulations on completing your Hogwarts House-themed coaster set! Please keep in mind that even after the resin has cured, high heat can still soften it.