Potter DIY: Fanged Frisbee
by Shinical
I think we’ve all dreamed about having our very own Fanged Frisbee at some point. Now you can! Here are some easy steps for making a Fanged Frisbee to delight your friends (and hide from Filch).
What You’ll Need:
- Low-density foam (10mm thick)
- Craft foam (2mm thick)
- Foam clay (optional)
- Glue
- Acrylic paint
- Sandpaper
- A box cutter/X-Acto knife/scissors
- Primer
Directions:
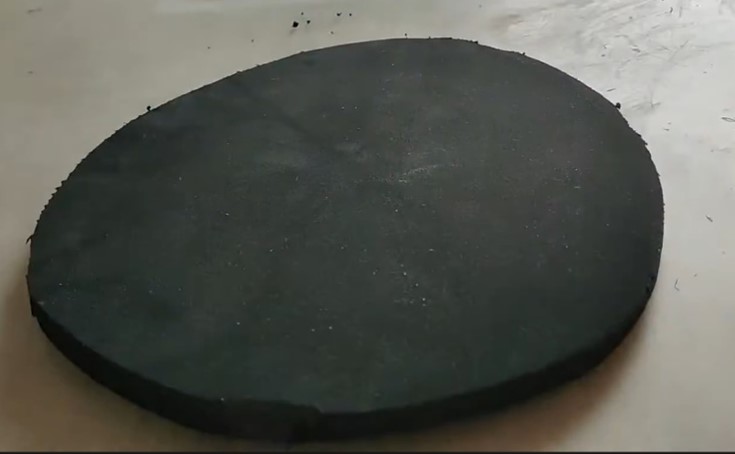
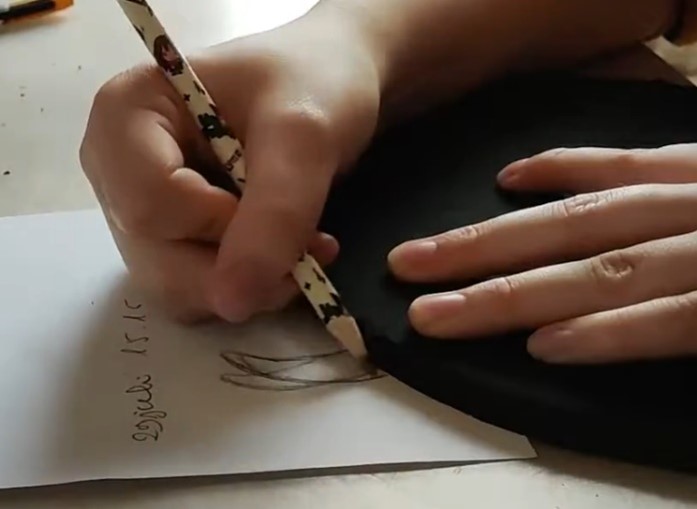
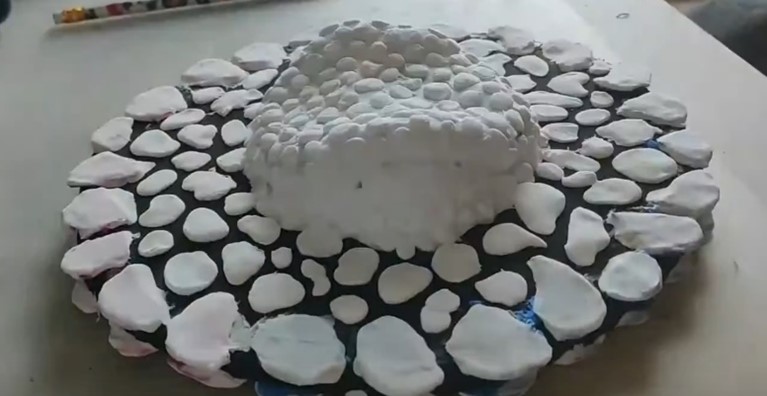
Step 1: To make the base, cut out a circle from the 10mm foam. Choose whatever diameter you prefer. You can use a circular bowl to help trace a circle onto the foam.
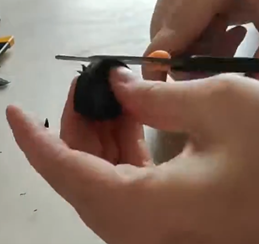
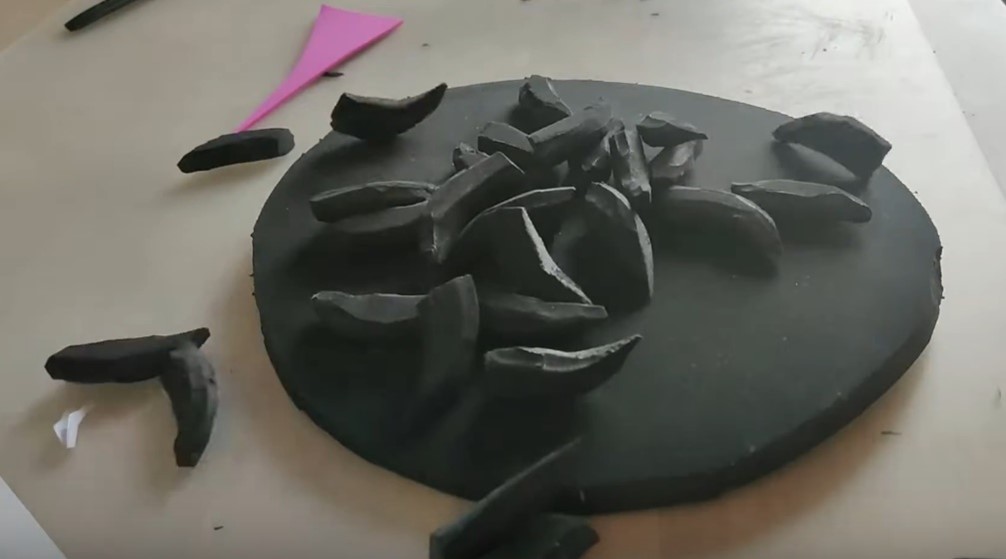
Step 2: Cut the teeth shapes out of the 10mm foam. To ensure the teeth were the size I wanted, I used my base circle to draw a template for them. If you have scraps from cutting out the circle, now is the time to use them. You will need more teeth than you think.

Step 3: Once you’ve cut out the teeth, you can start shaping them into a rounder shape. I found this the easiest to do with scissors. Once you get a general rounder shape, you can start sanding the teeth down to smooth them.
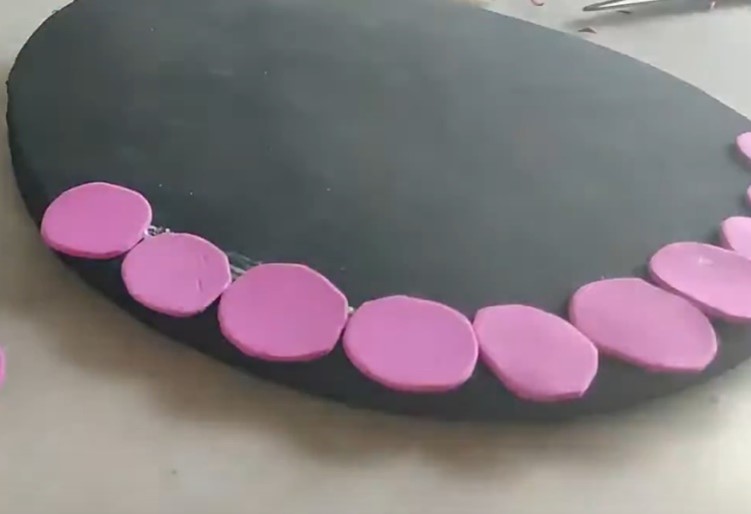
Step 4: Cut out the shape of scales from your craft foam. If you use more random shapes, it will look more natural. Start by planning your scales around the edges, and you can work from there. Do this both on the top and the bottom of the base. I started with similar-shaped scales, but I changed them up later on because I wanted more variety. Too many round shapes looked too unnatural, but I made sure the top part of the scale remained intact. You want to mirror the placement of the scales on both sides since you will want to place the teeth between these.
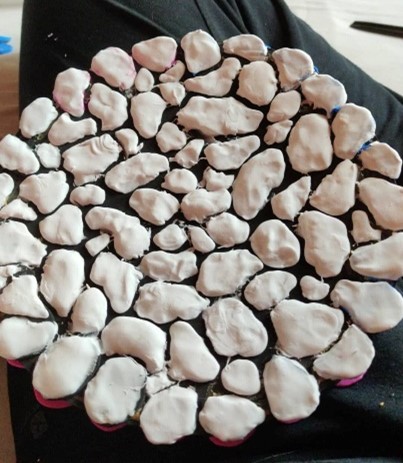
Step 5: On the bottom of your frisbee, fill up the whole face with scales. I used foam clay because it’s easier to get a round shape than with craft foam, which makes you have to shape the edges. If you don’t have foam clay available to you, craft foam will do just fine. Once again, this is a rather time-consuming process, but it’s easy to do it while watching a show or something. You will need more scales than you might think!
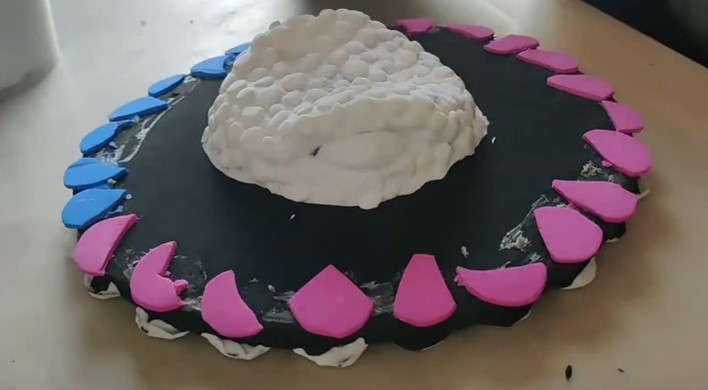
Step 6: On the top side of the frisbee, I made a head that sticks out. I cut two circles out of the 10mm foam and glued them on top of each other. I used my box cutter to carve out the general shape I wanted for the head. If you’re not using foam clay, I would recommend really taking the time to shape the head as well as you can.
I would not recommend using normal clay instead of foam clay since it will be too heavy. I used foam clay specifically so it wouldn’t weigh too much and wouldn’t break if I accidentally dropped it.
When you get a head shape you are happy with, simply glue it in the middle of the top part of the frisbee.

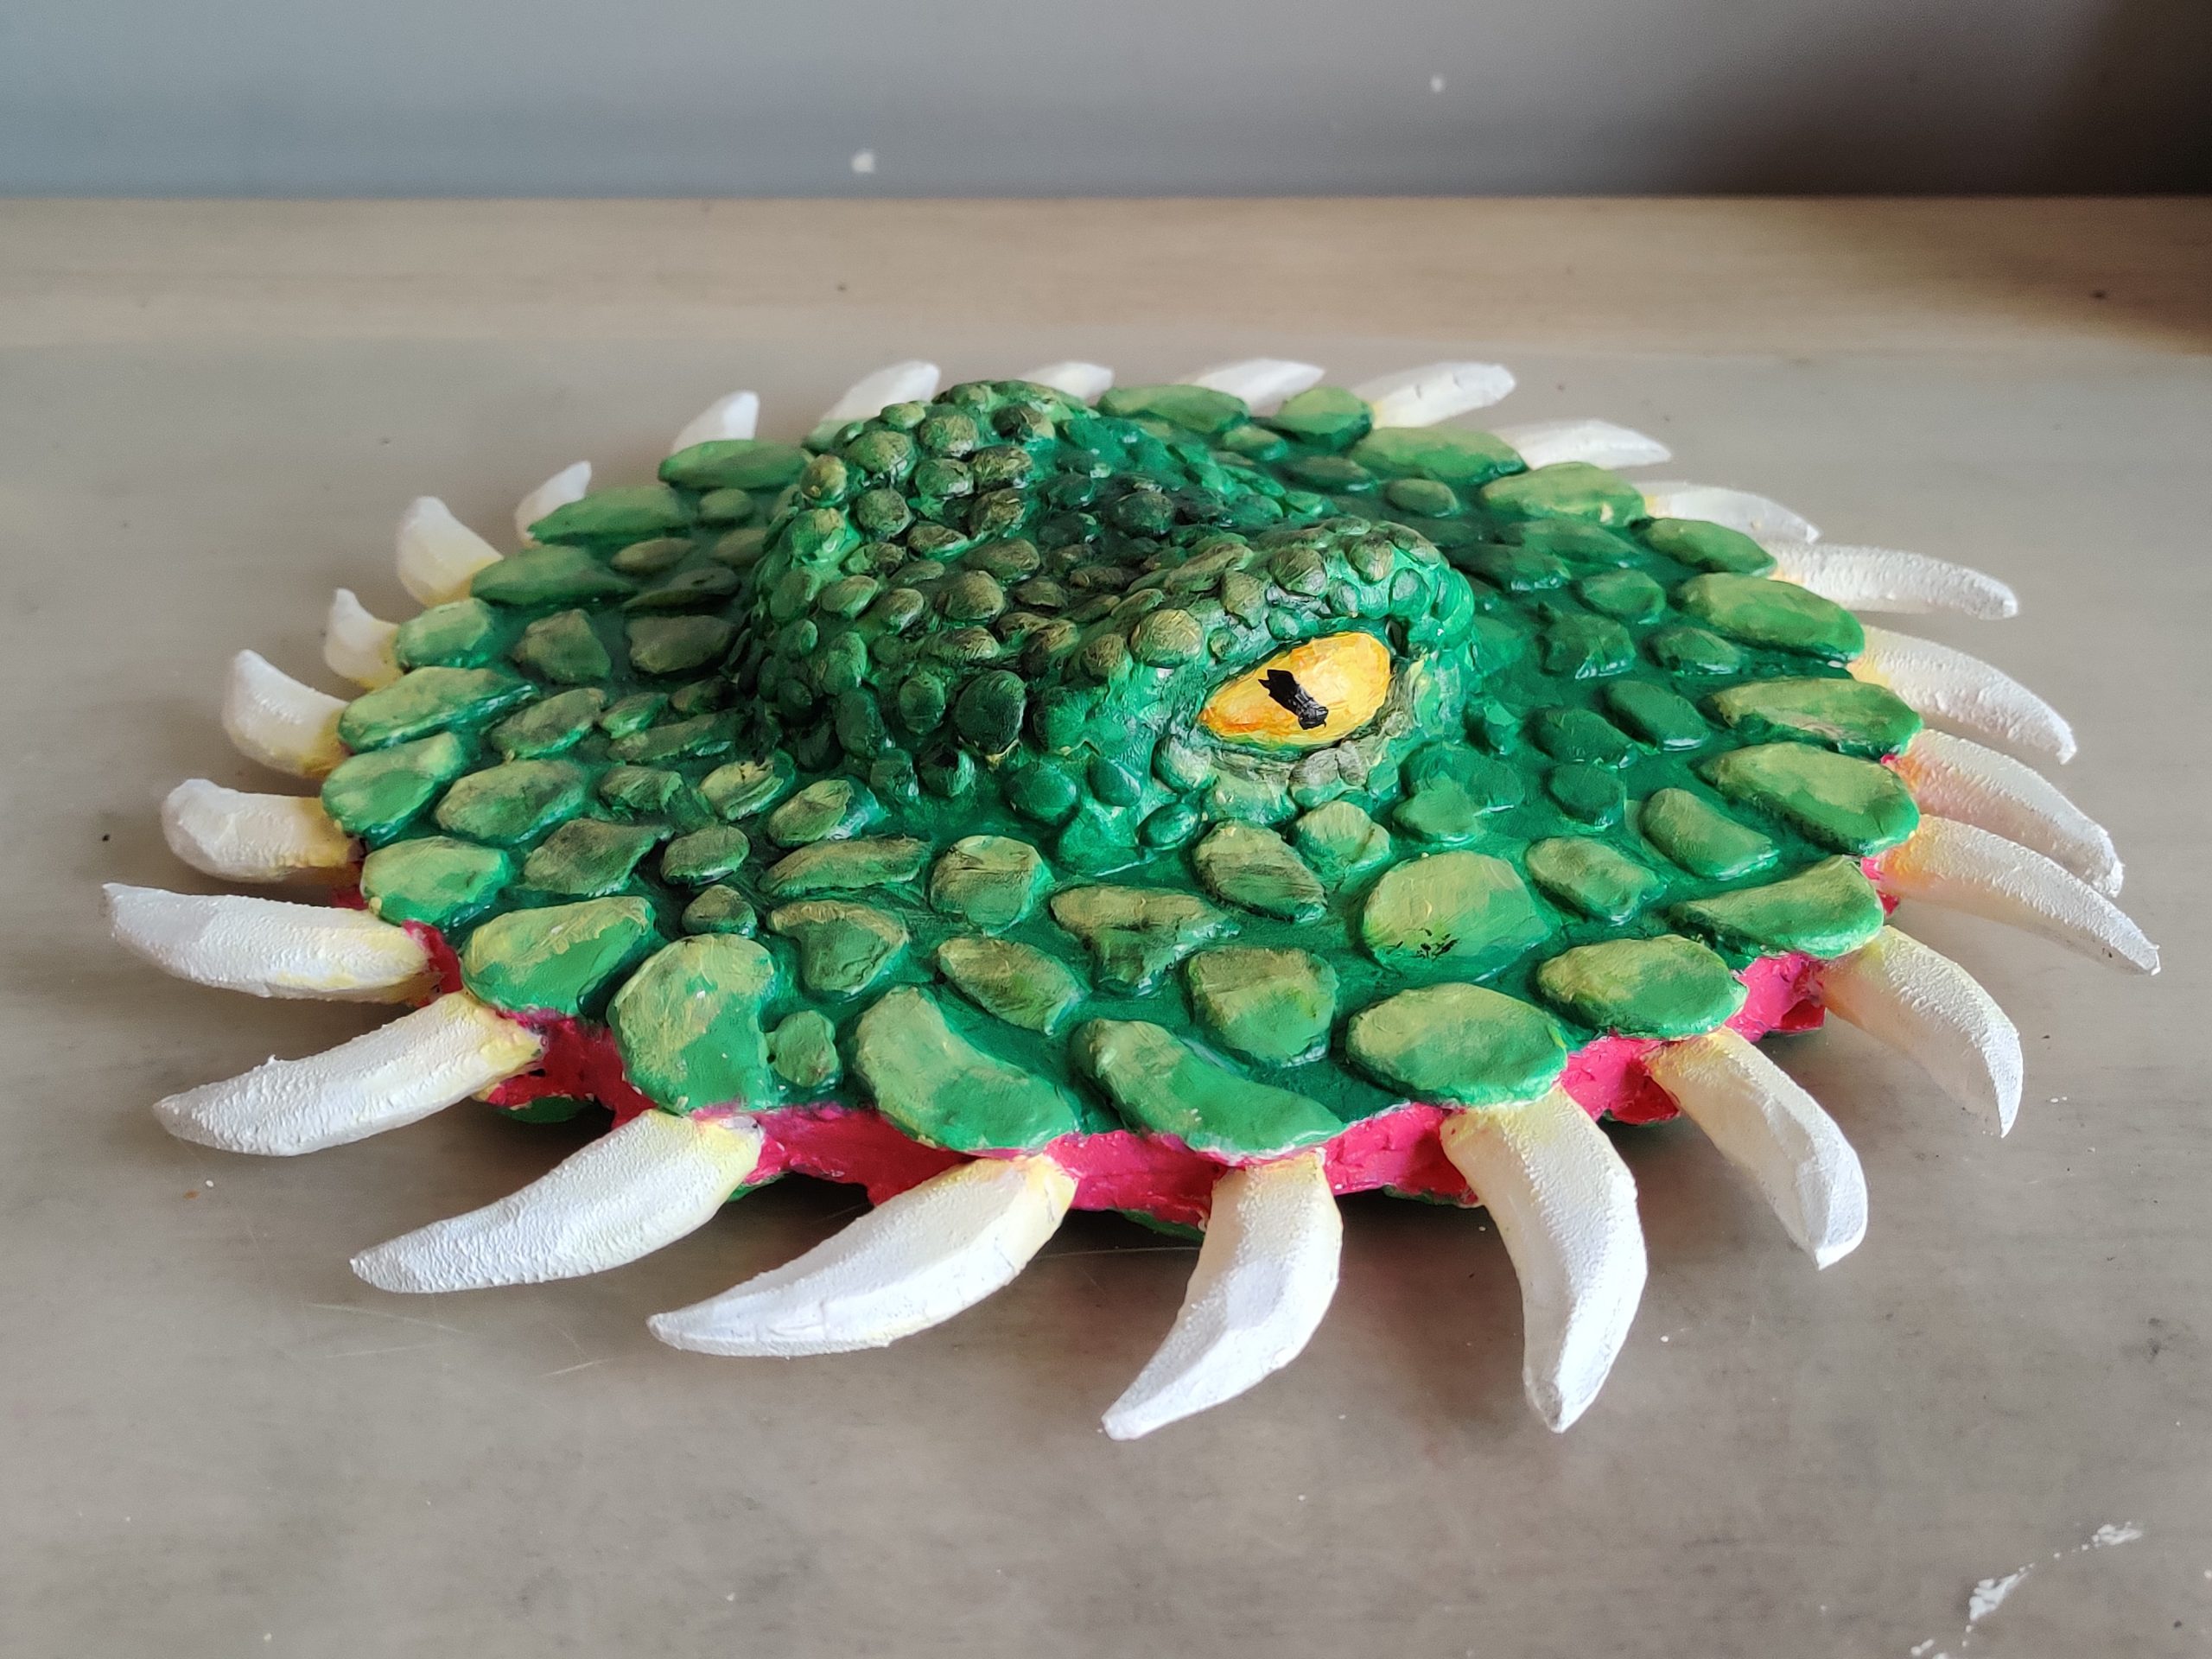
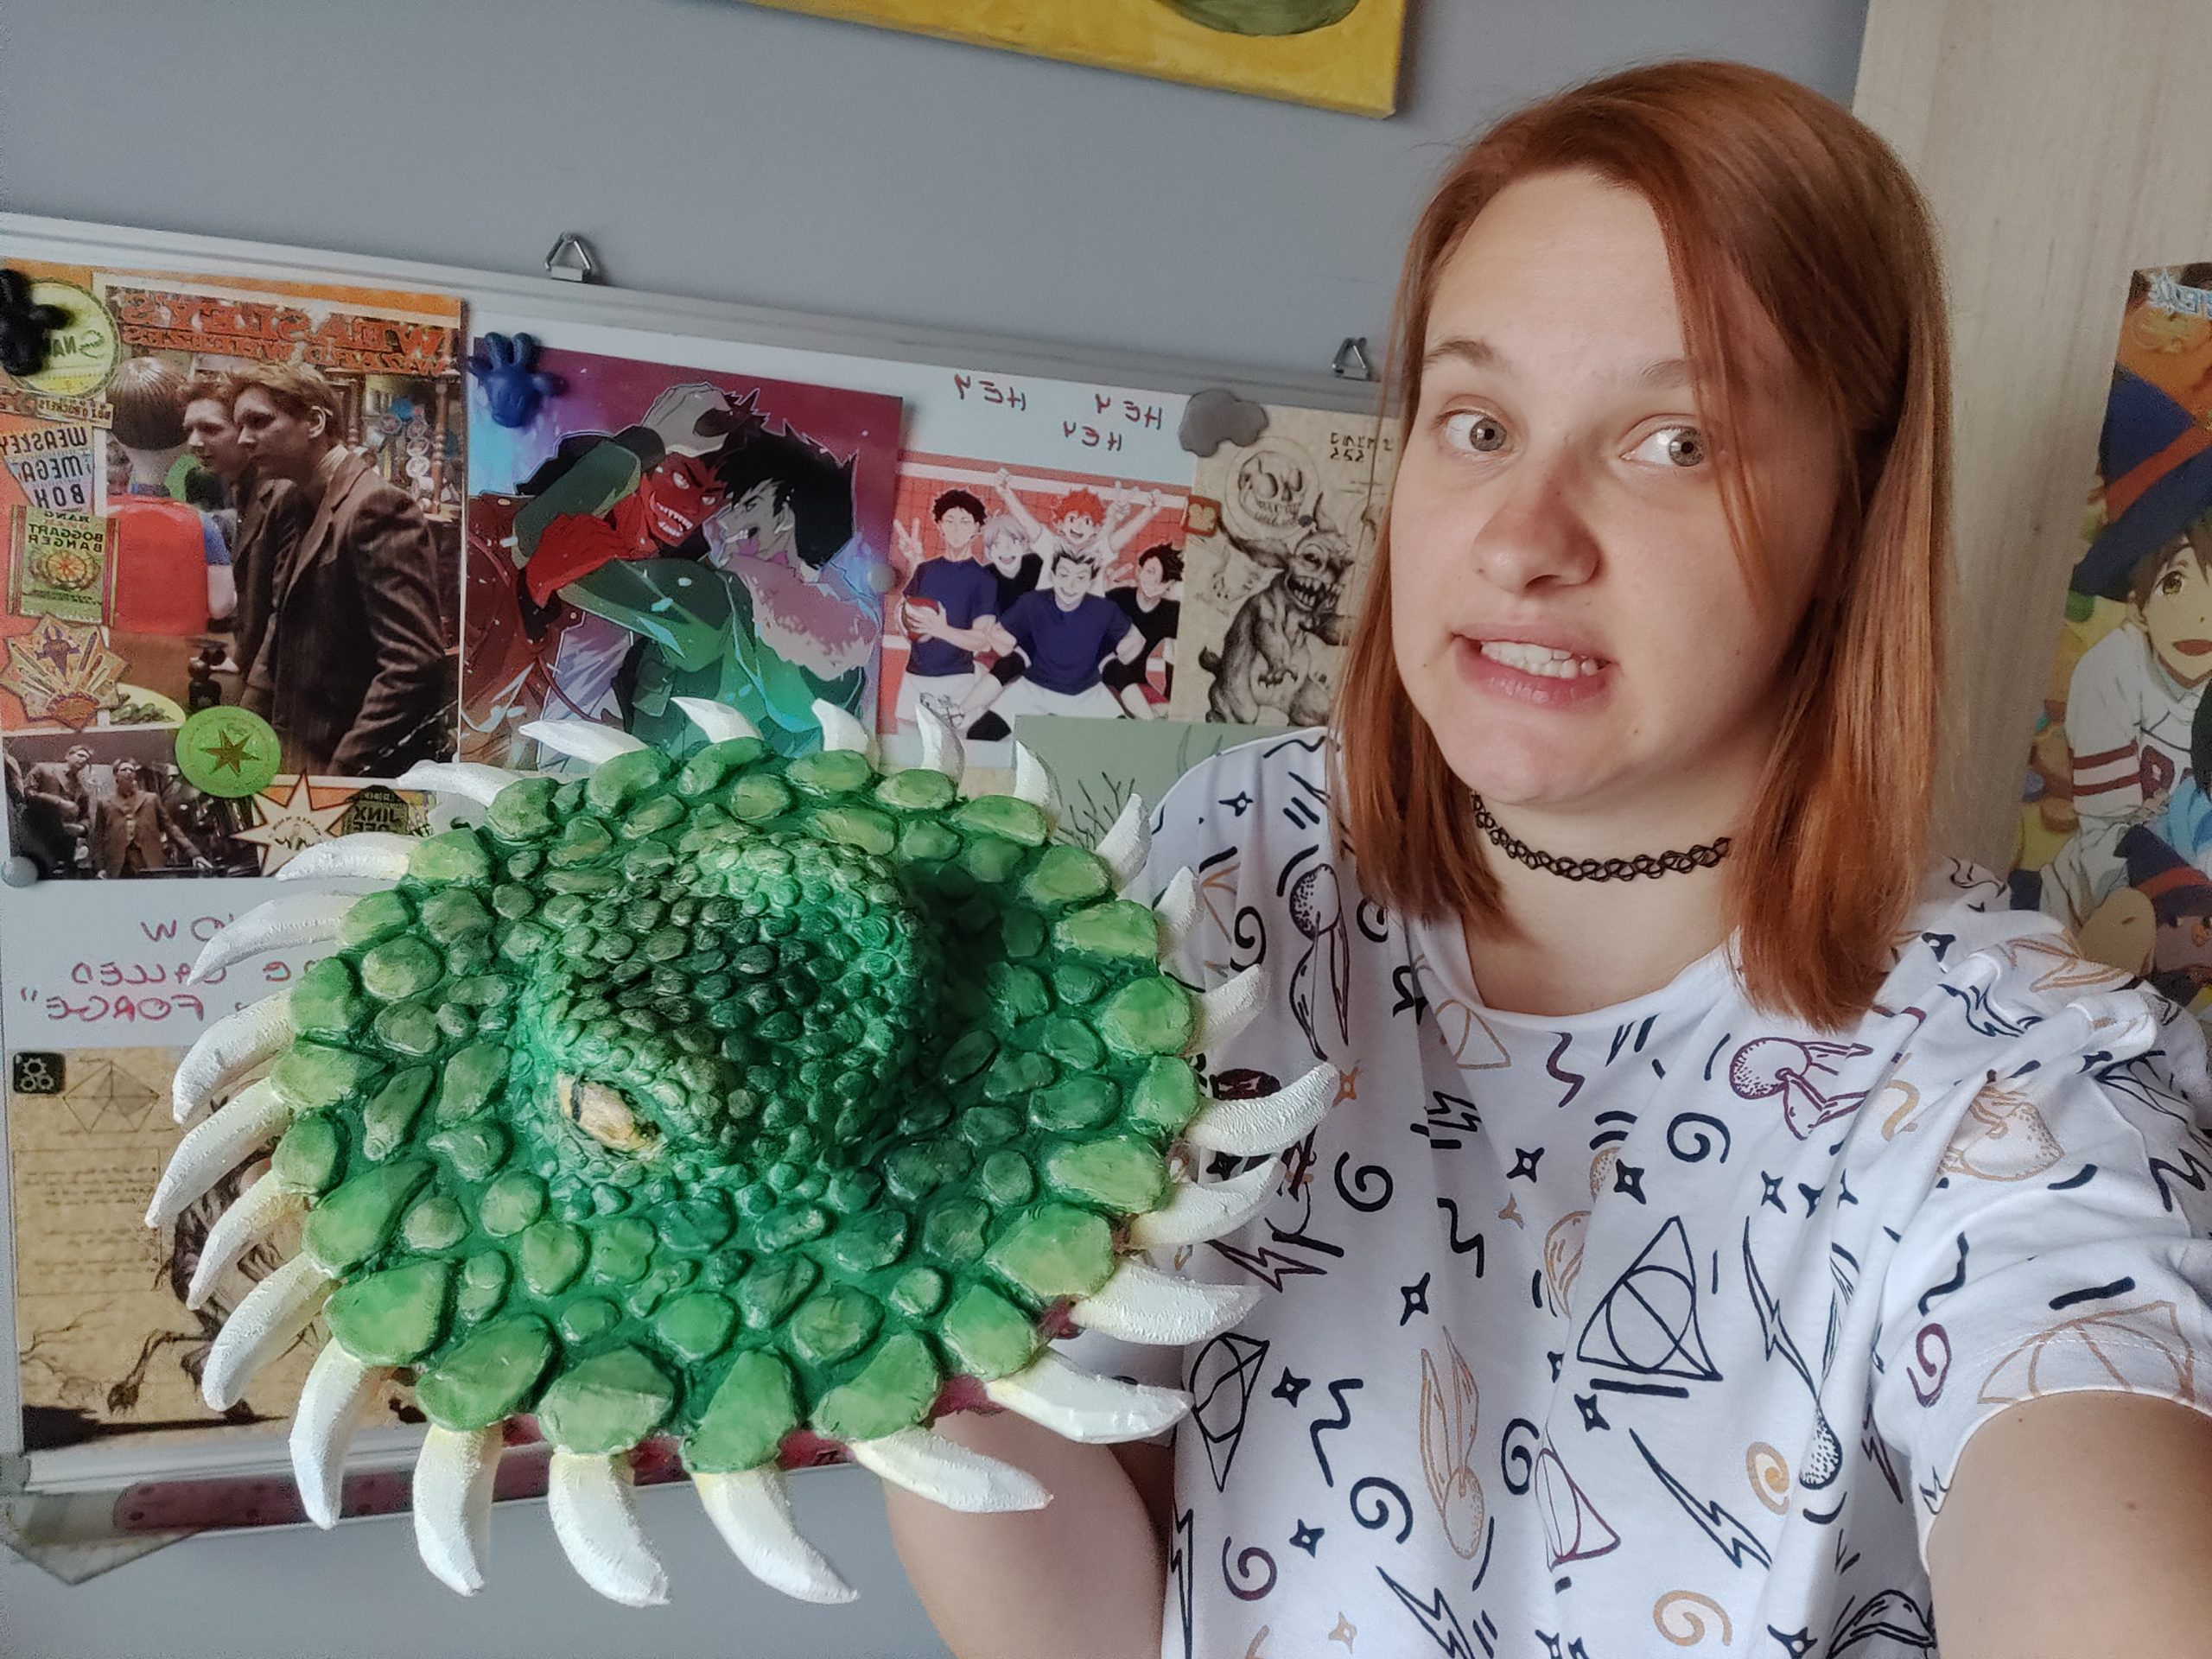
Step 7: The rest is mostly scales! I started by putting scales around the edge of the frisbee and around the base of the head. This helped me to know where I had to map out the other scales to fill up the rest. In general, I would recommend looking at concept art of Fanged Frisbees for reference, as well as crocodile eyes. Of course, you can use your imagination too and do what you feel will look best!
Step 8: Prime your frisbee and the teeth separately. I used about two or three layers of gesso, but you can also use Plastidip, Flexbond, or even wood glue. I would recommend at least two layers for a good base.
Step 9: Next, you paint it. I started with a simple green base and used a darker color in some places to add a bit of depth. I also mixed a lighter green and dry-brushed it on to try to create a gradient on the scales. Dry brushing is basically taking some paint on your dry brush, wiping your brush a bit, and then painting it onto the frisbee.
For the teeth, I kept the white color of the gesso and dry-brushed some yellow on the thick part of each tooth. Lastly, I used yellow for the eyes and dry-brushed an orange-red on the outer parts of the eyes to again create some depth. I then painted a black, snake-like pupil. I painted a pinkish-red on the border of the frisbee between the scales.
After the paint is dry, you can just glue on the teeth, and then you are all done!
This DIY was submitted by a MuggleNet reader. Have a DIY you want to submit? Check out our submission guidelines here.