Potter DIY: Potion Bottles
by Becky Davis
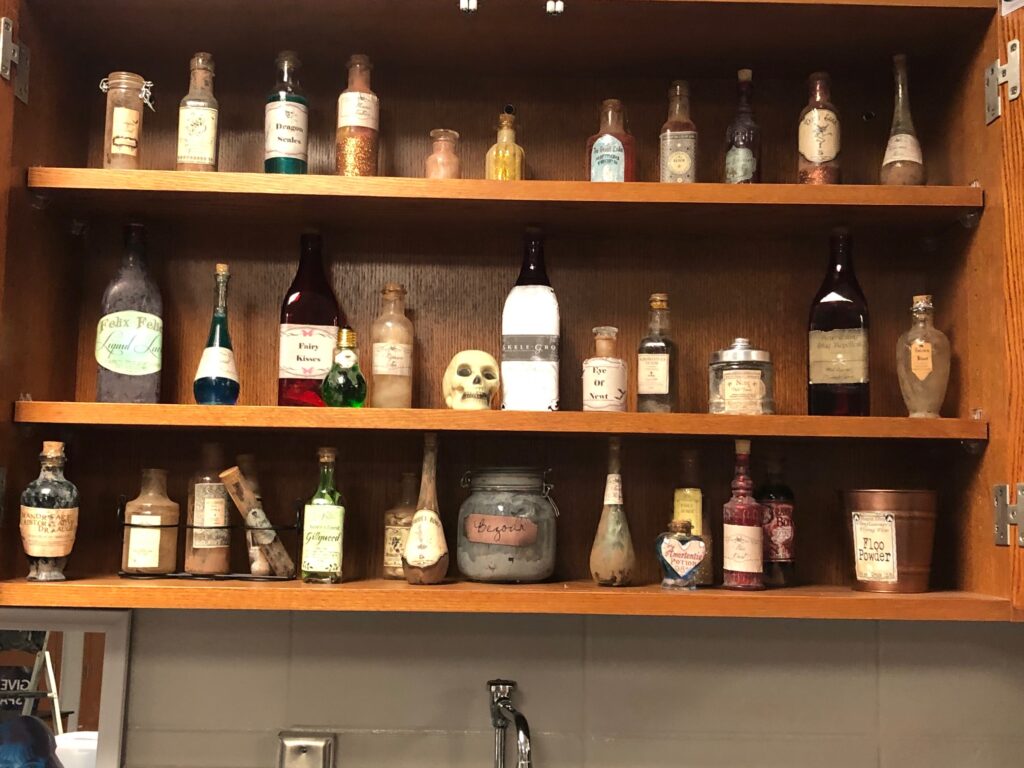
I am an 8th-grade science teacher who loves Harry Potter, so what better way to bring the series into my classroom than by turning it into a Potions classroom? I saw in a store window in Diagon Alley at the Wizarding World of Harry Potter potion bottles that had been created and displayed in the windows, and I admired how cool and creative they were. I went home from that trip with a plan in mind.
What You’ll Need:
- Clear and colored bottles
- 80 grit sandpaper
- Brown and black acrylic paint
- Small paintbrush
- Aged labels and printable labels
- Mod podge
- Glitter
- Sequins
- Food coloring
- Sand, dirt, and small rocks
Directions:
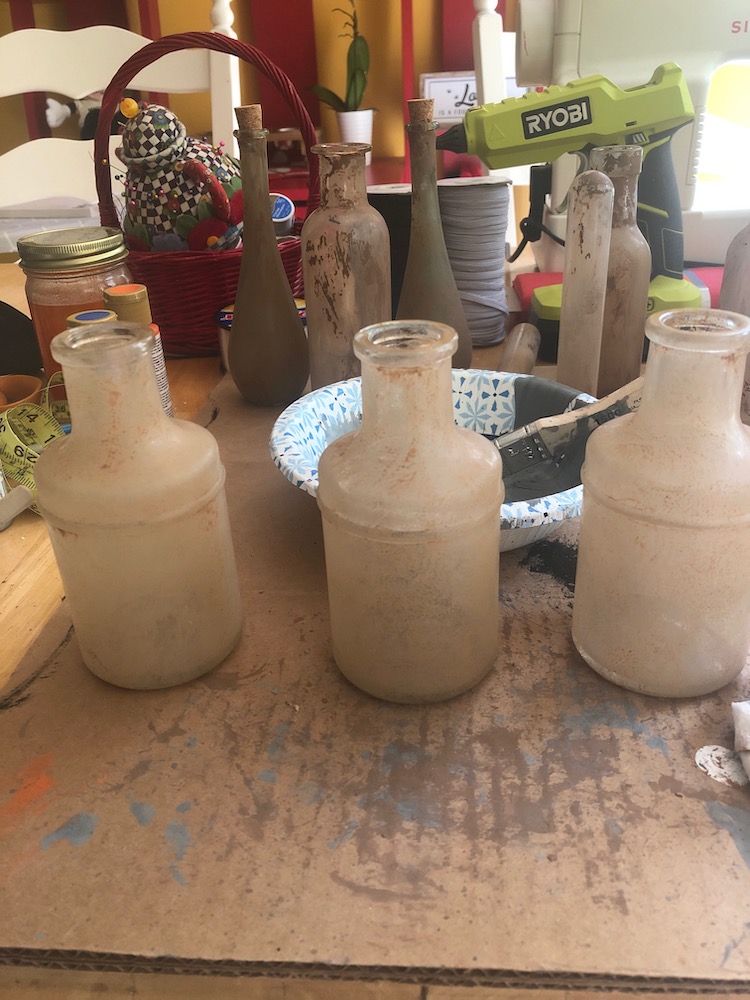
Step 1: I started collecting clear and colored bottles of all shapes and sizes from various thrift stores and local craft stores. I did some research on Pinterest on how to make bottles look aged and began to experiment. First, I scratched up the bottles with 80 grit sandpaper, rubbing in all directions, to scratch the bottles up to better allow the paint to stick.
Step 2: Then, I mixed brown acrylic paint with a bit of black acrylic paint until I had a very weathered base color. I painted each bottle with the weathered color paint with a small paintbrush to allow the bottle to have the “aged” look. I only allowed the paint to dry for only about 15-20 minutes (you want the paint tacky). I then smeared off most of the paint with a paper towel, leaving a distressed and aged look to the bottle.
Step 3: For the labels, I searched the internet for free aged labels, free Halloween-themed printable labels, and anything Harry Potter potions-related, and I downloaded them to my computer. I searched potion ingredients named in the Harry Potter books, made each ingredient a separate label, and printed the labels out. After cutting out the labels. I applied Mod Podge to the back of the label and glued it to the bottle I was going to use. Once the label adhered, I painted over the entire label with more Mod Podge to seal it to the bottle.
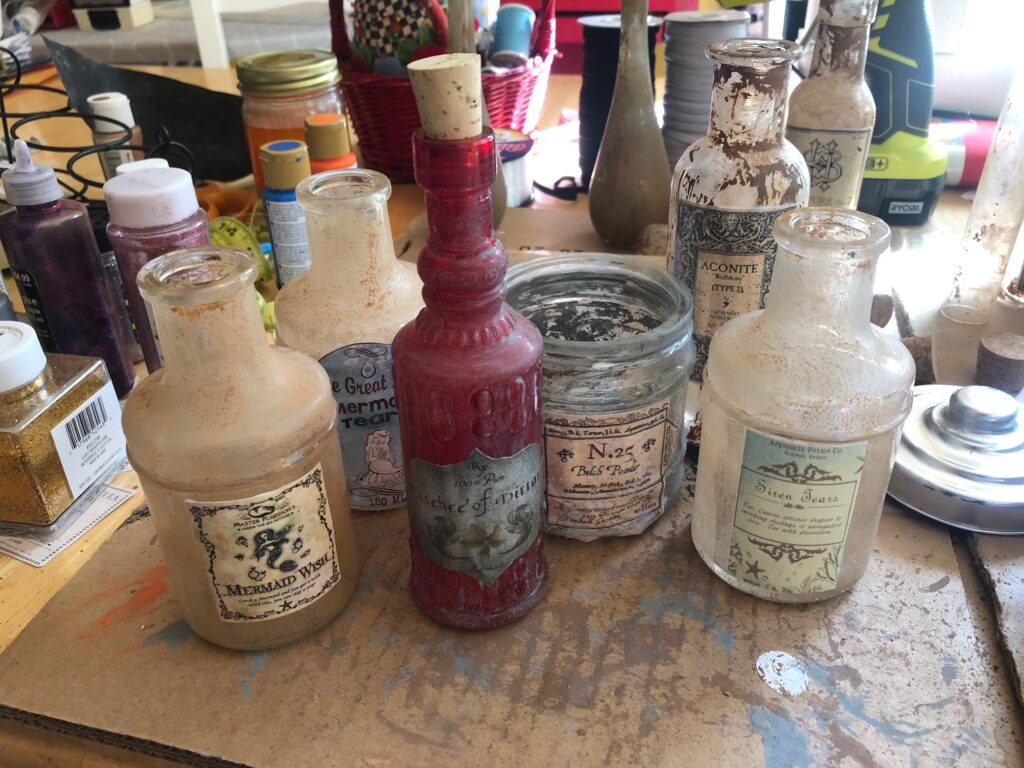
Step 4: Filling the bottles was the fun part. I used glitter, sequins, water colored with food coloring, fake leaves, and flowers. I also used sand/dirt (think Floo Powder), small river rocks (bezoars), and whatever else I could find (I did order some things from Amazon). My personal favorite is the unicorn hair (I brushed my long-haired cat and used his fur). My Fairy Kiss potion bottle is sparkling glitter in colored water.

My potion bottles are proudly displayed in a large cabinet in my classroom, and my students love them! It was a time-consuming project, but so worth it!