
Potter DIY: “Alohomora” Key Holder
by Mariana
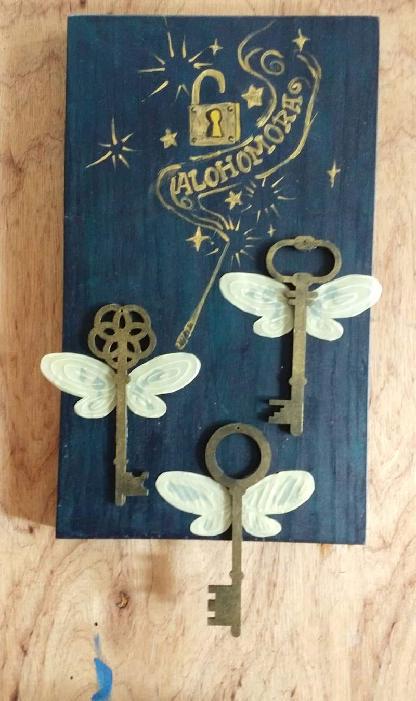
Do you need a place to keep your keys? We’ve got the perfect DIY for you. Make your own Alohomora key holder so you don’t have to rely on your wand to unlock your doors.
What You’ll Need:
- A piece of wood about 13” x 7.5” x 0.7”
- Acrylic paint, gold and a second color of your choice
- 2 Paint brushes, one large and one small
- A 9″ piece of string
- Sandpaper, grits 180 and 220
- 3 Old-fashioned-looking wooden keys
- Vellum paper
- 4 L-shaped screw hooks
- Alohomora printed design
- A drill and drill bits sizes 8 and 1/4
- Transparent lacquer
- Tape
- A pen (an old inkless one is preferable)
- A cotton ball
- Wood glue
- Ruler
Directions:
Step 1: Sand the piece of wood. Use the 180 sandpaper first and then use the 220 sandpaper. This will make the wood smooth and ready to be painted.
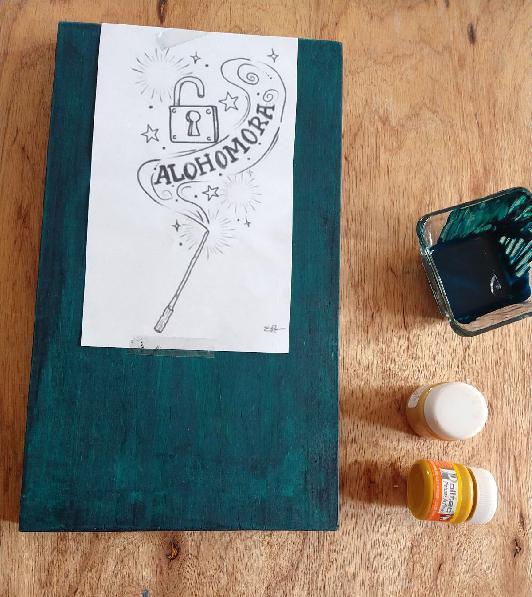
Step 2: Paint the wood with your base color. Two or three layers is recommended so that you completely cover the surface. Make sure to allow the paint to dry completely before applying another layer.
Step 3: After the paint dries, attach your Alohomora design to the wood using tape. Use a pen to trace the design on the paper. Use enough force so that you make an engraved copy on the wood. You just need the margin lines, so don’t worry about the darker parts of your design like the letters.
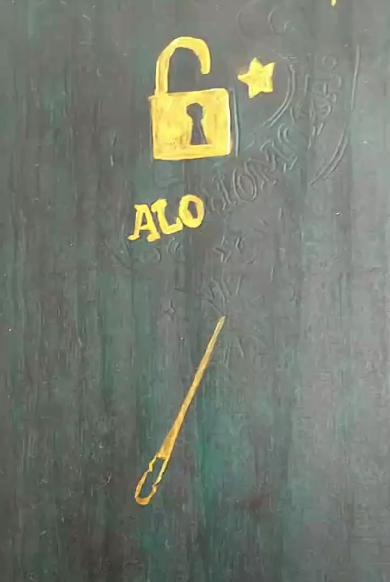
Step 4: Using your gold color, paint the design, following the “engraving” lines you made in the last step.
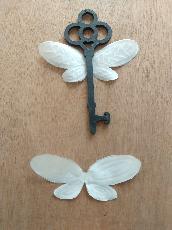
Step 5: For the keys, paint them first in black. Cover them completely. When they are dry, put a small amount of gold paint on a cotton ball and paint one side of the keys. Do it softly, barely touching the surface. That will give you an aged effect.
Step 6: On the vellum paper, mark firefly-like wings. You can mark the details with an inkless pen. Cut them and mark the space where they will attach to the keys.
Step 7: Place your keys on the wooden plaque in any order you’d like, and mark a bit of the silhouette. Apply a little bit of glue at the back of the keys and use the silhouette to glue them back in place.
Step 8: With a ruler, mark the places where the screw hooks will go at the bottom of the wooden plaque. Make sure to leave enough space between each one so you can place and retrieve your keys easily. Do the same at the top of the plaque. These marks will be for the holes where the string will go.
Step 9: Using the drill and the number 8 bit, make holes in the marks at the bottom. Do not pierce completely; this is only to facilitate the pass of the screws. Use the ¼ bit to make the holes for the string at the top. This time you will have to pierce completely. Finally, screw in the screws and tie the string to the top. Make sure that the string is strong enough to hold the plaque up.
Step 10: Apply a coat of transparent lacquer as a final touch – it will help protect the plaque from dust and other things. Remember to do it in a well-ventilated space.
Do you plan on making this DIY? Let us know in the comments. Be sure to check out our other Potter DIYs.